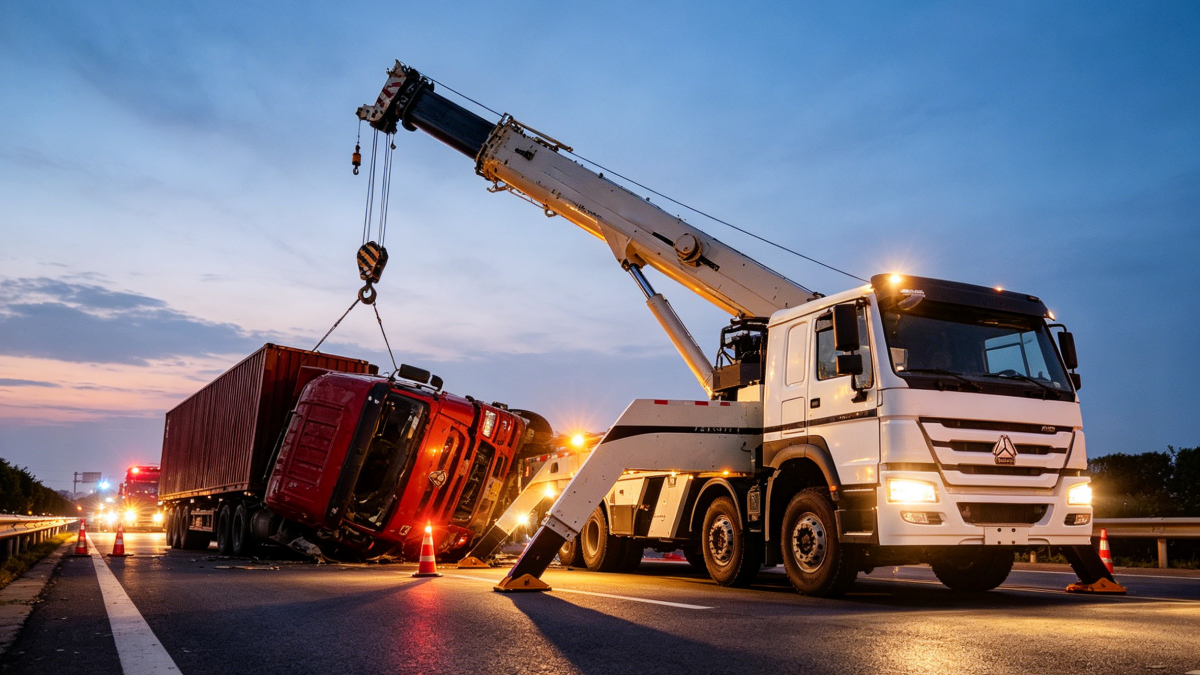
When a fully loaded trailer jackknifes across three lanes of a major highway, or a cement truck tumbles down a ravine, standard wreckers can’t handle the job. これが場所です ローテーターレッカー車 – a 360‑degree rotating heavy‑duty recovery machine – takes command.
But what exactly happens between the moment a rotator arrives on scene and the moment the road is completely cleared? Below is a step‑by‑step breakdown of a typical heavy‑duty recovery operation using a rotator tow truck.
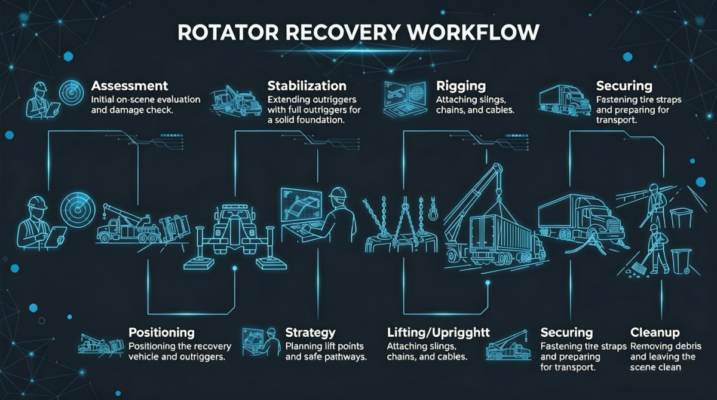
1. Arrival and Scene Assessment
The first three minutes set the stage.
When the rotator pulls up, the operator does not immediately start rigging. Instead, they conduct a high‑level assessment:
- Casualty condition – Is the vehicle overturned, on its side, or resting on its roof? Are there hazardous materials leaking?
- Ground conditions – Is the surface paved, gravel, mud, or uneven terrain? This determines outrigger placement.
- Access and egress – Can the rotator position itself safely without blocking emergency vehicle access?
- Load weight and center of gravity – A loaded fuel tanker behaves very differently from an empty flatbed trailer.
The operator also coordinates with police, fire crews, and EMS. The recovery plan is not made in isolation – it must fit within the larger incident command structure.
2. Positioning the Rotator
Where the rotator parks determines success or failure.
Unlike a conventional wrecker that can only pull from the front or rear, a rotator’s 360‑degree rotating boom allows it to work from virtually any angle. The operator chooses a position that:
- Provides a clear, unobstructed line to the casualty’s primary lifting or pulling points
- Keeps the rotator itself on stable, level ground (or uses cribbing to compensate)
- Respects the rotator’s load chart – distance and boom angle directly affect capacity
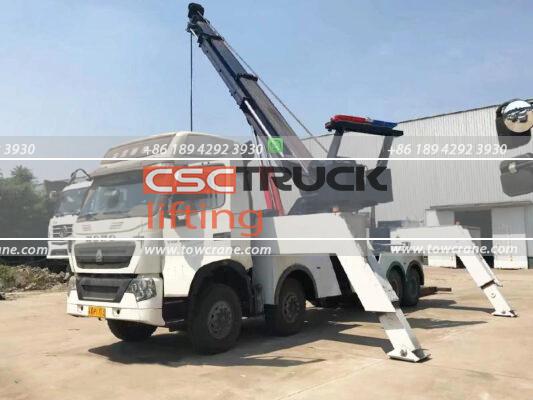
Modern rotators often have outriggers that extend wide and down independently. The operator deploys them to create an ultra‑stable platform, sometimes spanning three lanes of highway.
3. Stabilizing the Scene
Before lifting, you must stop movement.
If the casualty is unstable – for example, a trailer perched on a guardrail – the rotator operator may use:
- Secondary winch lines to apply light tension and prevent rolling
- Recovery straps or chains to anchor the casualty to fixed points
- Airbags or cribbing to fill voids under an overturned vehicle
Stabilization is not always dramatic; often it means simply ensuring the vehicle will not shift when tension is applied. This step is frequently overlooked by inexperienced crews, leading to secondary collapses or unexpected movement.
4. Determining the Lifting or Uprighting Strategy
One casualty, many possible approaches.
The rotator’s hydraulic boom can do more than just lift straight up. Common strategies include:
- Direct uprighting – The boom attaches to the overturned side, then slowly lifts and rolls the vehicle back onto its wheels.
- Side pull with roll‑over – A winch line is attached high on the casualty, pulling it laterally to flip it upright.
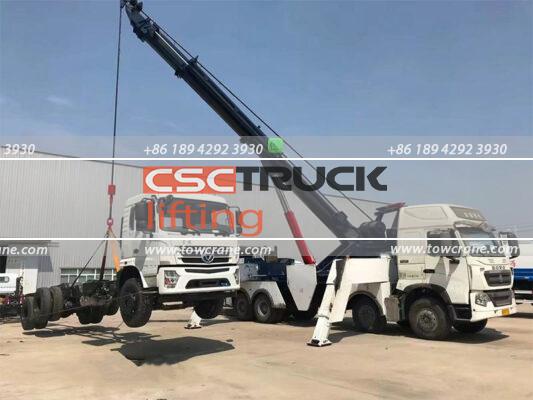
- Lift and transfer – The vehicle is lifted completely off the ground, rotated, and set onto a flatbed or dollies.
The choice depends on the casualty’s condition, 利用可能なスペース, and what will happen after it is upright. For a heavily damaged tractor, uprighting might be enough to tow away; for a pristine tanker, the goal may be zero additional damage.
5. Rigging the Casualty
Chains, ストラップ, shackles – every connection must be rated for the load.
Rigging is where theory meets muscle. The operator selects recovery points on the casualty – typically axles, frame rails, or dedicated tow eyes – and attaches:
- Grade 80 or Grade 100 チェーン for high‑strength lifting
- Synthetic slings to protect painted surfaces and reduce weight
- Snatch blocks to change winch line direction and multiply pulling force
Every component must be inspected for wear or damage. The working load limit (WLL) of the entire rigging system must exceed the expected load – a basic but critical rule.
The rotator’s wireless remote allows the operator to stand at a safe distance while slowly taking up slack. At this point, no serious lift has begun; the team is simply tensioning the system to confirm everything is seated correctly.
6. The Lift or Uprighting Maneuver
Slow, deliberate, and continuous – no jerking.
With the rigging secure and the rotator’s load moment indicator (LMI) showing green, the operator begins the actual lift. Hydraulic pressure builds, the boom moves, and the casualty slowly responds.
Key principles during this phase:
- No sudden movements – Smooth hydraulic control prevents shock loading that could snap chains or shift the casualty unpredictably.
- Constant monitoring – The operator watches boom angle, hydraulic pressure, and the casualty’s behavior. Any unexpected noise or tilt triggers an immediate pause.
- Staged lifting – For a rolled‑over semi, the rotator may lift the trailer a few feet, pause to reposition rigging, then continue.
For a full uprighting, the rotator typically lifts the overturned side until the vehicle’s center of gravity passes over the pivot point. At that moment, gravity takes over and the vehicle settles onto its wheels. The operator and ground crew stand well clear – this is the most dynamic part of the recovery.
7. Securing and Clearing the Casualty
Once upright, the job is only half done.
After the casualty is back on its wheels, the operator must prepare it for transport. This may involve:
- Towing with the rotator itself – Rotators are road‑legal and can tow the casualty directly using the underlift / wheel‑lift attachment.
- Transferring to a standard wrecker or flatbed – If the casualty is severely damaged, it may be moved onto a separate transport vehicle.
- Releasing air brakes – If the casualty’s air system is intact, the operator releases the parking brakes; さもないと, caster dollies are used.
The rotator’s underlift (the same system used for standard towing) is hydraulically adjustable to match the casualty’s axle height. Chains or straps secure the wheels to the underlift, and safety chains provide a backup connection.
8. Cleanup and Departure
The scene must be returned to a safe, drivable condition.
Once the casualty is removed, the recovery team:
- Cleans debris – Broken glass, spilled cargo, metal fragments
- Absorbs fluids – Fuel, oil, coolant – using absorbent pads or booms
- Removes rigging gear – Chains, ストラップ, snatch blocks are inspected and stowed
- Retracts outriggers – One by one, ensuring hydraulic lines aren’t pinched
ついに, the rotator drives away – sometimes directly to a repair facility or impound lot, sometimes back to the yard for the next call.
Summary: The Phases of a Rotator Recovery
| Phase | Key Actions | Typical Duration |
|---|---|---|
| Arrival & assessment | Coordinate with emergency services, evaluate the casualty and ground | 5–10 min |
| Positioning | Set up the rotator, deploy the outriggers | 5–10 min |
| Stabilization | Secure the casualty to prevent movement | 5–15 min |
| Strategy | Choose an uprighting method | 2–5 min |
| Rigging | Attach chains, slings, snatch blocks | 10–20 min |
| Lift/upright | Hydraulic lift to roll the casualty onto wheels | 10–30 min |
| Securing | Connect the underlift for towing | 5–10 min |
| Cleanup | Clear debris, retract outriggers | 5–15 min |
Final Thoughts
A rotator tow truck is not simply a bigger wrecker – it is a precision recovery instrument. From the moment it arrives until the final cleanup, every step follows a deliberate, safety‑first sequence. Understanding this breakdown helps fleet managers, safety officers, and even drivers appreciate the complexity and professionalism involved in heavy‑duty recovery.
If you are looking to upgrade your recovery capabilities, investing in a ローテーターレッカー車 is a smart choice. CSCTruck Towcrane provides a wide range of レッカー車 and offers customized solutions tailored to different industries and operational needs.


